


As I write this, I am almost 38 weeks pregnant and had resigned myself to store-bought Valentines this year for my daughter’s class. Don’t get me wrong, there is nothing wrong with store-bought Valentines. They have some really cute ones, but DIY projects are one of my favorite things, and I just wasn’t sure if I would have the time to make them this year! I love putting a personal spin on things, and sometimes DIY can be even less expensive — but definitely a little bit more time consuming.
I had already taken my daughter to Target to pick out her Valentines and like any 3-year-old, she was overwhelmed with all of the cool options and ultimately chose Paw Patrol puzzles and princess tiaras. Her school has a policy of no food or candy, so that cut out a lot of options.
During one of my bouts of pregnancy insomnia, I found myself scrolling Pinterest and came upon these adorable crayon hearts! I decided at about 3:30am, that I would go buy the supplies, and we would do a fun project together and that’s exactly what we did!
Here is what you need:
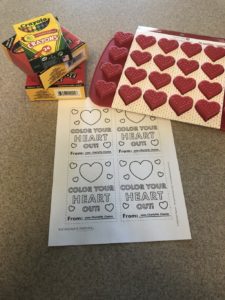
- Silicone Heart Mold– I purchased mine from Michaels and it was the perfect size with 24 little hearts.
- Box of 36 Crayons- I bought 2 boxes at the Dollar Tree just to be safe, but only ended up using one. I am making 30 Valentines.
- Cutting Board
- Card Stock
- Printable Template – There are tons of free printables on Pinterest. I used this one.
- Exacto Knife or Box Cutter (optional)
- Hot Glue Gun
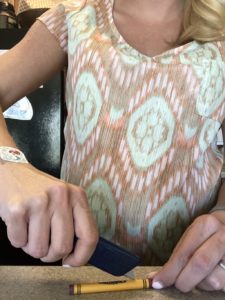
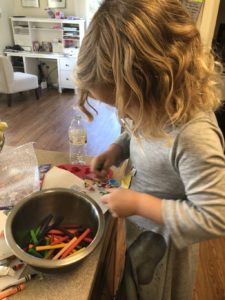
Step One: The most labor intensive part of this project is removing the crayons wrappers. After breaking a few nails, I broke out a box cutter to take the wrappers off. Then I would give them to Charlotte to break in half and put into the bowl. She loved this part!
Step Two: Preheat oven to 230 degrees.
Step Three: On your cutting board, spread out the crayons and chop into small pieces. To protect your cutting board, cover with a piece of parchment paper.
Step Four: Divide the crayons evenly amongst the molds. They will melt down, so you don’t need to fill to the top. You can also group colors together, but ours was a free for all (and they turned out really cute and unique) 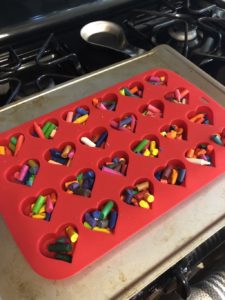
Step Five: Place on a baking sheet and bake for 25 to 30 minutes at 230 degrees. We have a gas oven and the original instructions said 15 minutes, but it took longer for them to melt. Just keep an eye on them.
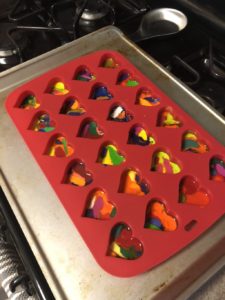
Step Six: Cool and then pop out of the mold.
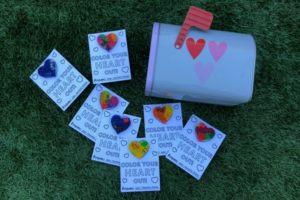
Step Seven: Print your printable, cut them out and have your child write his or her name.
Step Eight: Use a hot glue gun to glue the heart onto the card stock cutout.
What Valentines have your children picked out this year?


